Did you know that over 2.9 billion people use Facebook, making it essential to keep your account information up to date? Changing your email on Facebook may seem daunting, but it’s vital for security, communication, and account recovery. Whether you’ve switched providers, faced privacy concerns, or simply want to declutter your inbox, updating your email can streamline your online experience.
In just a few minutes, you can enhance your account’s security while ensuring you never miss out on important notifications or messages. This guide will walk you through the process step-by-step, providing you with the confidence to navigate Facebook’s settings with ease. Take control of your account today and learn how to change your email address effectively!
How to Find Your Current Email on Facebook
Finding your current email address associated with your Facebook account is a crucial step if you plan on making updates or ensuring your account remains secure. It’s not uncommon for users to forget which email they used during the sign-up process, especially if they’ve had multiple accounts or changes over the years. Fortunately, locating this information is straightforward, allowing you to easily keep your contact details up to date.
To discover your registered email on Facebook, follow these simple steps:
- Log In to Your Facebook Account: Start by opening your preferred web browser or the Facebook app and logging into your account with your username and password.
- Access Your Account Settings: Once logged in, click on the downward-facing arrow in the top right corner for desktop users (or the hamburger menu in the app) to access the menu options. Select “Settings & Privacy,” then click on “Settings” from the dropdown.
- Navigate to Your General Account Settings: In the left sidebar, click on “General.” This section provides an overview of your basic account information.
- View Your Email Address: Under the “Contact” section, you’ll see the email address or addresses currently associated with your account listed there.
If your account is secured with two-factor authentication or if you can’t remember your password, don’t worry. You can still use Facebook’s recovery options by clicking on “Forgot Password?” at the login page, which will guide you through the process of retrieving your login details.
By ensuring you have the correct email address registered, you protect yourself against losing access to your account in the future. Keeping your contact information updated not only streamlines account recovery processes but also fortifies your account against unauthorized access.
For those who are managing Business accounts, it is equally important to have accurate contact details to ensure customers can reach you without issues. With these simple steps, locating your current email becomes a breeze, empowering you to keep your Facebook account secure and functioning smoothly.
Step-by-Step Guide to Change Your Email

Updating your email on Facebook is a straightforward process that can significantly improve your account’s security and accessibility. Whether you’re switching to a new email provider or simply want to ensure your primary email address is current, following these steps will help you make the change swiftly and efficiently.
Start the process by logging into your Facebook account using your credentials. Once you’re in, navigate to the “Settings & Privacy” section, which you can access by clicking on the downward-facing arrow in the upper right corner of your screen. Selecting “Settings” will direct you to your account settings page.
Next, you’ll want to find the “Contact” section under “General Account Settings.” Here, you will see your current email address listed. To change it, click on “Edit” next to the email section. This will prompt you to enter your new email address. Ensure it is typed correctly to avoid any issues later on. After entering your new email, Facebook may ask you to confirm your identity, typically through a password check or two-factor authentication if it’s enabled. This step further ensures that your account remains secure.
Once you’ve made your entry, click on the “Save Changes” button to finalize the update. Facebook will usually send a confirmation email to both your old and new email addresses. You must click the link in the confirmation email sent to your new address to verify it. This process is vital, as it prevents someone else from making unauthorized changes to your account.
In summary, changing your email on Facebook is not just a matter of convenience; it also enhances your account’s safety. By keeping your email address up to date, you’re ensuring that important notifications, recovery links, and security alerts reach you promptly, allowing for a seamless experience on the platform. If you encounter any difficulties during the process, remember that Facebook has extensive help resources available to assist you, ensuring you can regain access and maintain control over your account effortlessly.
Common Issues When Updating Your Email

Updating your email on Facebook can sometimes lead to unexpected bumps along the road, and knowing how to navigate these common issues can make the experience smoother and less stressful. One of the most prevalent problems users encounter is entering an incorrect email address. Even a small typo can prevent you from receiving the verification email, leaving you in limbo. To avoid this, double-check your entry for accuracy before saving the changes, and consider utilizing copy-paste for convenience when switching from your email program.
Another frequent hurdle is related to account verification. If you have two-factor authentication activated and haven’t completed the necessary steps, or if you’ve forgotten your password, the system may block your email update attempt. In such cases, take a moment to reset your password before returning to the email update process. Additionally, if you’re using a new device or browser, Facebook’s security settings might trigger a verification process, which can temporarily delay your email change. Always ensure you have access to the devices you typically use to log in, as this can help smooth out the verification steps.
If you experience difficulties receiving the confirmation email, it might be worth checking your spam or junk folders. Sometimes legitimate emails can be misdirected due to spam filters. Adding Facebook’s email addresses to your contact list or whitelisting them in your email settings can significantly enhance the chances of your verification emails landing in your inbox.
Common Issues Overview
| Issue | Potential Solution |
|---|---|
| Incorrect Email Entry | Double-check for typos and use copy-paste to ensure accuracy. |
| Verification Blocked | Reset your password or complete two-factor authentication. |
| Missing Confirmation Email | Check your spam folder and consider whitelisting Facebook email addresses. |
Lastly, be aware that there might be temporary restrictions on your account if you’ve made multiple changes in a short time frame. Facebook does this to protect your security, so if you find yourself restricted, wait a period before attempting to change your email again. It’s essential to be patient during this process and trust that these safeguards protect your account from unauthorized access. Taking these precautions not only helps resolve issues efficiently but also reinforces your account’s security.
Enhancing Your Account Security After Changes

Enhancing the security of your Facebook account after changing your email is vital in today’s digital age, where cyber threats are increasingly sophisticated. After updating your email address, it’s crucial to take proactive measures to ensure that your account remains protected against unauthorized access and potential breaches. By implementing the right security features, you can significantly reduce the risks of account compromise.
First and foremost, consider enabling two-factor authentication (2FA) if you haven’t done so already. This additional layer of security requires not only your password but also a unique code sent to your new email address or a mobile device each time you log in from a different device or browser. To activate 2FA, go to Settings & Privacy > Settings > Security and Login, and look for the “Two-Factor Authentication” section. Following the prompts will guide you through linking your account to a trusted device or app, such as Google Authenticator or your mobile number.
Next, regularly review and manage your active sessions and devices. Facebook allows you to see where your account is currently logged in. Navigate to Settings & Privacy > Settings > Security and Login, and review the “Where You’re Logged In” section. If you see devices or locations that you don’t recognize, promptly log out from those sessions to prevent unauthorized access.
Another essential aspect of enhancing your account security is to regularly update your password. A strong, unique password that combines uppercase letters, numbers, and symbols can significantly lower your risk of falling victim to hacking attempts. Use a password manager to generate and store complex passwords securely, making it easier to manage multiple online accounts without reusable passwords.
Finally, stay informed on phishing scams that may target your new email. Always be cautious about emails that ask for personal information or direct you to external websites. Facebook rarely asks for sensitive information via email. Make it a habit to verify the sender’s email address and look for signs of fraudulent content. Keeping your email secure contributes not only to your Facebook account’s safety but also to your overall online presence.
By following these steps and staying vigilant, you can enhance the security of your Facebook account after changing your email address and enjoy peace of mind knowing that your information is better protected.
- Enable two-factor authentication to add an extra layer of security.
- Review active sessions regularly to identify any unauthorized access.
- Use a strong, unique password and consider a password manager for convenience.
- Be vigilant against phishing attempts targeting your new email address.
Verifying Your New Email Address
on Facebook is a critical step that often goes overlooked but is essential for maintaining account security and ensuring you receive important notifications. Once you’ve updated your email, Facebook sends a verification link to the new address. Following this simple yet crucial action confirms your email’s validity and allows Facebook to keep communicating with you seamlessly.
To start the verification process, check your new email inbox for a message from Facebook. Be sure to also look in your spam or junk folders, as sometimes these automated emails can mistakenly land there. The subject line usually reads something like “Verify Your New Email Address.” Inside the email, you will find a link that says “Confirm Your Email Address” or something similar. Click on this link, and you’ll be redirected to Facebook’s website, where your new email address will be confirmed.
Troubleshooting Verification Issues
If you do not receive the verification email, don’t worry! Here are some steps you can take to resolve the issue:
- Double-check email spelling: Make sure you entered your new email address correctly when making changes.
- Request a new verification email: Go to Settings & Privacy > Settings > General Account Settings, and look for the option to resend the confirmation email.
- Check email filters: Ensure your email provider isn’t blocking Facebook emails or filtering them to a different folder.
- Try a different browser: Occasionally, browser settings or extensions may prevent email verification links from working correctly.
Once you’ve verified your email, it’s also wise to ensure that your Facebook account settings are adjusted to reflect any new privacy preferences. Being proactive with this confirmation can prevent future access issues, such as missing notification updates regarding security alerts or changes to your account settings.
Remember, verifying your new email is not just a formality-it’s a safeguard against unauthorized account access. Taking these straightforward steps leads to a smoother and more secure experience on Facebook.
Troubleshooting Email Change Errors

Making changes to your email on Facebook is generally a straightforward task; however, users often encounter frustrating issues along the way. You might have completed all the necessary steps-entered your new email, confirmed it, and yet something still isn’t right. Considering the importance of email updates for security and communication on the platform, understanding how to troubleshoot errors effectively can save you time and enhance your user experience.
First and foremost, if you’re facing difficulties receiving the verification email, ensure that the inbox you’re checking is the one linked to the new email address you provided. It’s also vital to check the spam or junk folders, as automated messages from Facebook can sometimes end up there due to spam filters. If the email is nowhere to be found, double-check the email address for typographical errors. Even minor spelling mistakes can prevent Facebook from delivering the verification link.
If you’ve confirmed that the email is correct but still haven’t received the verification link, you can easily request a new email. Navigate to Settings & Privacy > Settings > General Account Settings and look for an option to resend the confirmation email. This step often resolves the issue quickly. In addition, consider any browser-specific problems; occasionally, using a different internet browser or disabling any extensions that may block pop-ups can make all the difference in accessing your email verifications.
For those who may still face obstacles even after resending the verification link, checking and adjusting email filters is a practical approach. Ensure that your email provider isn’t inadvertently blocking or filtering out Facebook emails. Moreover, maintaining a secure and updated email setup is an essential component of your overall Facebook security strategy. Updating email settings, including enabling two-factor authentication, enhances your account safety significantly.
With these practical troubleshooting tips, you can navigate the email update process on Facebook with confidence, ensuring your account remains secure and connected. Embrace the experience with patience, as resolving these errors often leads to a better, more informed engagement with the platform.
Updating Email on Facebook App vs. Website

When it comes to updating your email address on Facebook, the process can vary slightly depending on whether you’re using the mobile app or the desktop website. Understanding these differences can enhance your efficiency and confidence when managing your account settings.
On the Facebook App, the interface is streamlined for mobile use, which means you can change your email quickly without the clutter of a full desktop view. To start, open the app and tap on the three horizontal lines (menu) at the bottom right corner (iOS) or top right corner (Android). Scroll down and select Settings & Privacy, then tap on Settings. Under the Account settings, you’ll find the General section. Tap on Contact and then Add email address to enter your new email. After making the change, Facebook will prompt you to verify the new address. Don’t forget to check for emails in your inbox and spam folder, as you might need to complete the verification process swiftly.
On the Website, the process is just as simple, but with a few more options available. Start by logging into your Facebook account and clicking the downward arrow in the top right corner of the page to access the menu. Select Settings & Privacy, then proceed to Settings. In the General Account Settings, you will see your current email address listed; click on Edit next to it. You can add a new email and set it as your primary one. Similar to the app, a verification email will be sent to the new address, which you need to confirm to finalize the update.
Key Differences
While both platforms offer similar functionalities, some features may differ slightly in presentation or accessibility. Here are some aspects to consider:
- Ease of Access: The app prioritizes quick access for on-the-go users, while the website may offer more detailed settings options.
- Notification Settings: The website allows for more extensive customization of notifications related to email changes, making it easier to manage what you receive.
- Visual Layout: The desktop version facilitates multitasking, allowing you to view and manage various account settings side by side, whereas the app focuses on a single process view.
Regardless of your choice of platform, updating your email on Facebook is designed to be user-friendly, but complications can arise. If you encounter any challenges, refer back to the troubleshooting section for additional guidance. Embrace the tools at your disposal, knowing that managing your Facebook account can enhance both your security and communication experience.
How to Change Email for Business Accounts

Changing the email address associated with your Facebook business account may seem daunting, but with a clear process, you can accomplish this quickly and efficiently. Keeping your contact information up to date is crucial for business communications, particularly for receiving important notifications related to page management, ads, and insights. Let’s dive into the straightforward steps required to change your email for your business account.
To start the process, log into your Facebook business account using the desktop version, as this offers a more comprehensive interface suited for managing multiple business tools. Click the downward arrow in the upper-right corner and select Settings & Privacy, then navigate to Settings. You’ll find the General tab on the left sidebar; click on it to access your account information. Here, you’ll see your current email under the Contact section. Click Edit next to your email address, and enter the new email you wish to use.
After entering the new email, set it as your primary contact by ticking the appropriate box. Facebook will then send a verification email to your new address. Be sure to check both your inbox and spam folder for this verification. Once you receive the email, click on the confirmation link provided to finalize your email update.
For those who manage a Facebook page or ad accounts, it’s worth noting that any changes made will automatically update in those areas as well. This means you’ll continue receiving vital business notifications on your new email without any hitches. If you encounter issues during this process, common troubleshooting steps include checking if the email format is correct and ensuring you have internet connectivity.
Considerations for Managing Business Communication
Ensuring your email is regularly updated is not just about receiving messages; it’s also about maintaining secure communication pathways with your clients and customers. Here are a few proactive steps to enhance your email management:
- Maintain Professionalism: Use a business domain email (e.g., yourname@yourbusiness.com) rather than a generic email provider for a more professional appearance.
- Utilize Notifications: Make use of Facebook’s notification settings to stay informed about activities related to your business, such as new messages or comments.
- Regularly Review Security Settings: Keep your security settings current, such as enabling two-factor authentication to protect your business account effectively.
Changing your email address for Facebook business accounts can significantly improve your workflow and communication efficiency. By following these straightforward steps, you’re better positioned to manage your online presence seamlessly and ensure your business stays connected to its audience.
Tips for Keeping Your Facebook Account Secure

Keeping your Facebook account safe is more crucial than ever in our increasingly digital world. With personal data and business communications integrated into the platform, a few proactive measures can shield you from potential security risks. Here are some strategies and tips to enhance the security of your Facebook account.
Strengthening Your Password
Your password is the first line of defense against unauthorized access. Make sure to create a strong password that combines uppercase and lowercase letters, numbers, and symbols. Avoid using easily guessed information, like names or birthdays. A unique phrase or a series of random words can also be effective as a password. Consider using a password manager to keep track of different passwords securely, as relying on memory alone can lead to simple mistakes or reused passwords across platforms.
Enable Two-Factor Authentication
Utilizing two-factor authentication (2FA) is one of the simplest yet most effective ways to enhance your account security. After enabling 2FA, you will be required to enter a code sent to your mobile device or use an app like Google Authenticator whenever you log in from an unrecognized device. This added layer of security minimizes the chances of unauthorized access, as it requires both your password and a secondary verification method.
Review Your Privacy Settings
Regularly checking and updating your privacy settings can help you maintain control over who has access to your information. Navigate to the Settings & Privacy section to adjust the visibility of your posts, manage friend requests, and restrict access to your personal data. For business accounts, ensure that sensitive information regarding your customers is only shared with trusted individuals.
Be Cautious About Third-Party Apps
Many users connect third-party applications to their Facebook accounts for various functionalities. While these can enhance your experience, they can also pose security risks. Regularly review the apps linked to your account through the Apps and Websites section in the settings, and remove any that you no longer use or trust. Always be wary of granting new apps extensive permissions unless absolutely necessary.
Monitor Account Activity
Keep an eye on your account activity to catch unauthorized actions. Facebook offers a feature that allows you to see where you’re logged in and to log out of devices you don’t recognize. Check this feature regularly to ensure that your account remains accessible only to you. If you spot any suspicious activity, change your password immediately and review your security settings to determine how access was gained.
By employing these techniques, you can help secure your Facebook account effectively, allowing you to focus on what really matters-engaging with your personal network or managing your business communications without fear of privacy breaches. Making these practices a habit is an investment in your online security that pays off in peace of mind.
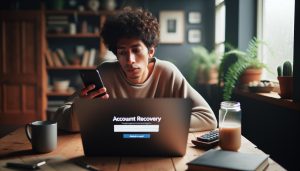
Recovering Your Account if You Lose Access
Losing access to your Facebook account can be a frustrating experience, especially when it’s tied to important connections and communications. Fortunately, there are ways to regain access and ensure your account remains secure. Whether you’ve forgotten your password, lost access to the email associated with your profile, or received a security alert indicating unauthorized activity, taking the proper steps can help you recover your account swiftly.
To start the recovery process, navigate to the Facebook login page and click on “Forgot Password?” This will direct you to a page where you’ll need to enter your email address or phone number. Facebook will then send you a verification code to the contact method linked to your account. If you no longer have access to that email or phone number, click on “No longer have access to these?” to get further options. Here are the steps for various scenarios:
Using Trusted Contacts
If you’ve set up trusted contacts, you can enlist their help in regaining access. Here’s how:
- On the recovery page, select “No longer have access to these?”
- Follow the prompts to identify trusted contacts.
- Your contacts will receive a unique link that enables them to access a recovery code for you.
- Use this code to regain access to your account.
Identifying Your Account
If you’re unable to receive codes via email or phone, you can still verify your identity. Facebook may ask you to identify friends in photos, answer security questions, or provide identification information like your birth date or any other recognizable details related to your account. The more accurate your information is, the higher the chances Facebook will verify your identity successfully.
Recovering Without Access to Email or Phone
In case you’ve lost all access to your email and phone number, recover your account by reporting your issue to Facebook:
- Visit the Facebook Help Center and select “Get Help with a Login Issue.”
- Fill out the recovery form with as much detail about your account as possible.
- Provide any identification they request, such as a government-issued ID.
While this process may take longer, providing detailed and accurate information helps expedite the review.
Prevention is Key
Once you’ve regained access, it’s most effective to strengthen your account security to prevent future issues. Regularly update your email address, maintain current recovery phone numbers, and set up two-factor authentication for added security. This proactive approach not only safeguards your account from unauthorized access but also ensures that recovery options remain accessible.
Having a plan in place and understanding the recovery process can alleviate concerns surrounding the loss of access to your Facebook account. With the right steps, you can quickly regain your footing, refocus on your connections, and enhance your account’s security measures to prevent future access issues.
Managing Notifications Related to Your Email
on Facebook is essential for staying informed about your account’s activity without feeling overwhelmed. Did you know that fine-tuning your notification settings not only enhances your user experience but also helps safeguard your account? By taking control of how and when you receive notifications, you can ensure that you’re promptly alerted to crucial updates while avoiding unnecessary distractions.
To adjust your email notification preferences, start by accessing your Facebook account settings. Here’s a simple step-by-step guide to streamline this process:
Step-by-Step Guide to Adjust Email Notifications
- Log into Facebook: Open your web browser or the Facebook app and sign in to your account.
- Access Settings: Click on the downward-facing arrow in the top right corner (on desktop) or tap the three horizontal lines (on mobile) to open the menu. Select “Settings & Privacy,” then click on “Settings.”
- Navigate to Notifications: In the left sidebar (on desktop), find and click on “Notifications.” On mobile, you may need to scroll to find this option.
- Modify Email Preferences: Look for “Email” or “Email Notifications.” Here, you’ll see various categories such as friend requests, messages, and security alerts. Toggle the settings to choose which notifications you want to receive via email.
- Save Changes: Ensure your preferences are correctly set, then exit the settings.
By following these steps, you can diligently manage notifications that matter most to you. You can opt to receive updates on urgent issues like security breaches while silencing less critical notifications related to trivial activities. This targeted approach saves your email inbox from clutter and helps you maintain focus on what’s important.
Keep an Eye on Security Notifications
One crucial aspect of your notification management is prioritizing security. Facebook sends important security alerts to your registered email address whenever suspicious activities occur, such as an unrecognized login attempt. Ensure that your security notifications are turned on to receive these updates. You can find these settings under the “Security and Login” section in your account settings.
In some cases, users may find that they inadvertently miss critical notifications due to busy inboxes. To combat this, consider creating a specific folder for your Facebook-related emails. Set up filters to automatically direct notifications into this folder, enabling you to keep track of important updates without sifting through other emails.
Consider Email Frequency and Mode
It’s also beneficial to reflect on how often you want to receive these notifications. Facebook often sends multiple notifications about similar activities, and you might find it helpful to consolidate them into a daily or weekly summary instead. This feature can usually be found in the notifications settings, allowing you to choose a frequency that aligns with your lifestyle.
In essence, effectively managing your Facebook email notifications not only streamlines your online experience but also enhances your overall account security. By keeping your settings tailored to your needs, you maintain control over your communications and ensure you never miss a vital message while avoiding the overwhelm of excessive notifications.
Why You Should Regularly Update Your Email Address
Regularly updating your email address associated with your Facebook account can significantly enhance your online security and improve your user experience. As your email serves as a primary communication channel for Facebook alerts, having an up-to-date and secure email address ensures that you receive important notifications and safeguard your account against potential threats. If your email has changed or if you’ve acquired a more secure or frequently checked email account, now is the perfect time to make that update.
Securing Your Account from Unauthorized Access
One of the biggest risks of maintaining an outdated email is the increased vulnerability to unauthorized access. If you no longer have access to your previous email account, you may miss critical notifications about suspicious login attempts or changes made to your account. This leaves your Facebook account at risk of being compromised without your knowledge. By keeping your email current, you enable Facebook to send alerts promptly, allowing you to respond quickly to potential security threats.
Streamlining Account Recovery
Another compelling reason to keep your email updated is to streamline the recovery process if you ever lose access to your account. Suppose you forget your password or experience a security breach. In that case, Facebook requires a verified email address to send recovery links or codes. If your email address is outdated, recovering access can become a frustrating ordeal, potentially locking you out of your social network and valuable connections.
Ensuring Consistent Communication
Moreover, an updated email ensures consistent communication from Facebook regarding account changes, term updates, and feature announcements. This means you can stay informed about the latest features that enhance your user experience, like new privacy settings or updated security measures. By regularly updating your email, you position yourself to receive relevant information directly from Facebook, making your online engagement more informed and enjoyable.
In closing, maintaining an updated email address is not just a good practice; it’s essential for security, recovery, and overall communication efficiency. Ensure that the email linked to your Facebook account reflects your current contact information, helping you make the most out of your social media experience while keeping your account protected.
Q&A
Q: How can I check if my email change on Facebook was successful?
A: To check if your email change was successful, log into your Facebook account and navigate to the Settings & Privacy section. Click on Settings, then look for Contact under General. Your new email should be listed there. Ensure you’ve also received a confirmation email from Facebook.
Q: What if I don’t have access to my old email on Facebook?
A: If you can’t access your old email, try using the Forgot Password? option on the login page. Facebook will provide alternative recovery methods, such as using your phone number or answering security questions. Once you regain access, you can proceed with changing your email.
Q: Will changing my email on Facebook affect my business page?
A: Changing your email on your personal Facebook account does not directly affect your business page. However, it’s advisable to update the email linked to your business page if it’s associated with your personal account. This ensures you receive important notifications regarding your page.
Q: How do I ensure my new email is secure on Facebook?
A: To secure your new email on Facebook, enable two-factor authentication in Security and Login settings. Additionally, regularly update your password and be cautious of phishing attempts to protect your account.
Q: Can I change my email on Facebook using a mobile device?
A: Yes, you can change your email on the Facebook mobile app. Go to Settings > Personal Information > Contact Info. Tap on your current email to edit, then follow the prompts to update it securely.
Q: How long does it take for my new email to be active on Facebook?
A: Your new email becomes active almost immediately after verification. After changing your email, ensure you check your inbox for a verification link from Facebook, as clicking that link is necessary for full activation.
Q: Is it safe to link my personal email to my Facebook account?
A: Linking your personal email to Facebook can be safe if you follow security best practices, such as using strong passwords and enabling two-factor authentication. Be cautious about sharing personal information publicly to enhance privacy.
Q: Why is Facebook asking for my password when I change my email?
A: Facebook requests your password when changing your email for security reasons. This step verifies your identity and ensures that unauthorized users cannot alter important account information. Always choose a strong, unique password.
Concluding Remarks
Now that you know how to change your email on Facebook quickly and easily, don’t let another moment pass without keeping your account secure and updated! Remember, updating your email is crucial for recovering your account and ensuring you receive important notifications. If you have any lingering questions or need more tips on managing your Facebook settings, check out our guide on enhancing your Facebook privacy and learn how to safeguard your information effectively.
Feeling inspired? Dive deeper into our resources on Facebook for Business to maximize your online presence or explore the latest features with our step-by-step Facebook tutorial series. We encourage you to share your own tips or ask questions in the comments below-your experience could help someone else navigate their Facebook journey! Don’t wait any longer; embark on your next steps today to enhance your digital footprint and ensure you’re making the most of Facebook’s evolving features.